
5. InControl 2 Configuration
Through InControl, Peplink’s cloud-based device management and monitoring application, this section provides an overview of the InControl settings and information specific to the Peplink Switch.
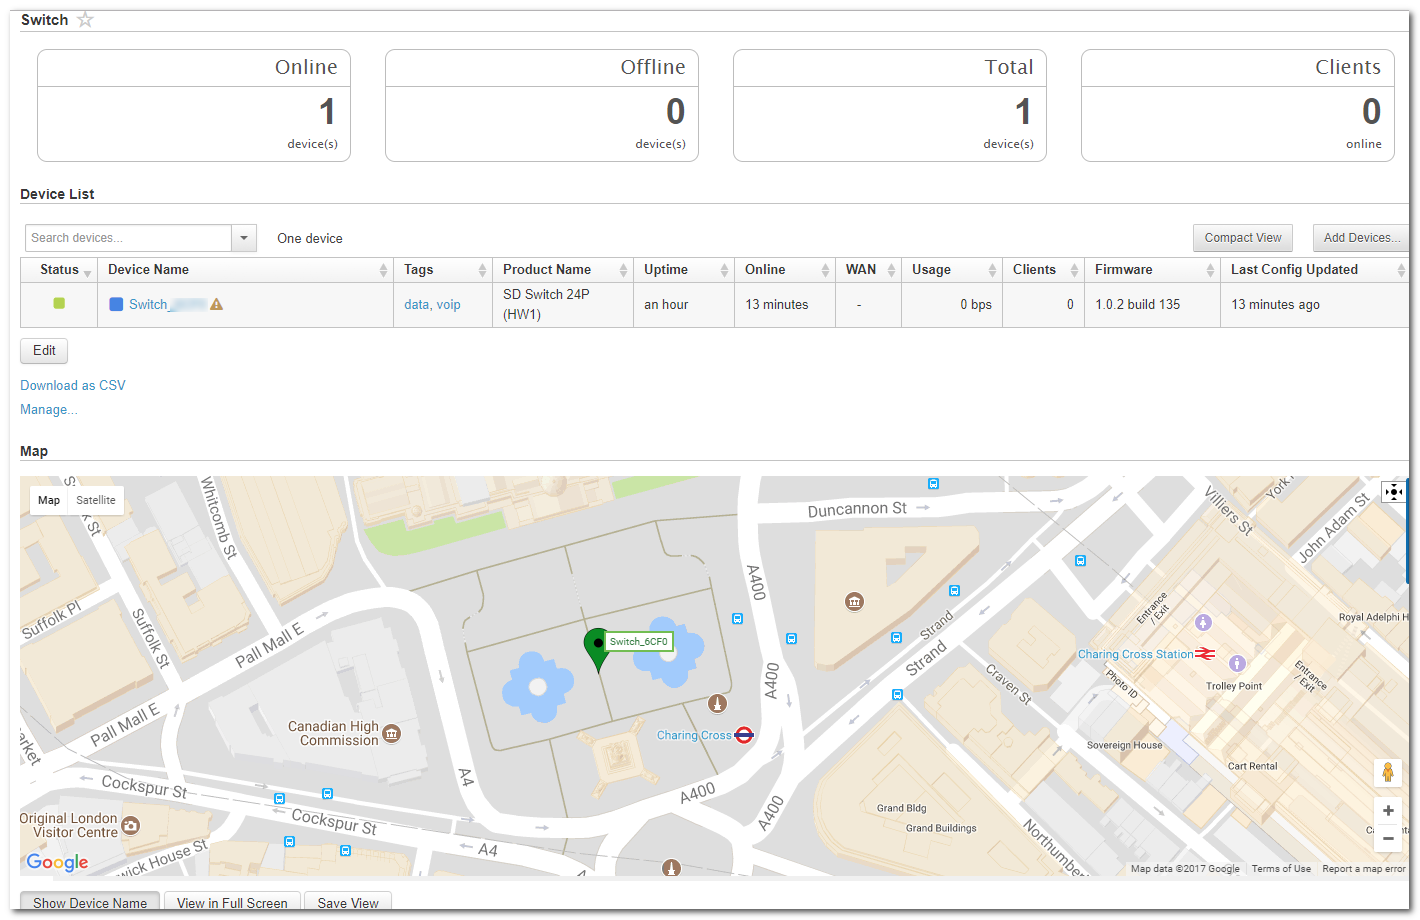
The switch will appear online in InControl 2 if it successfully connects to the InControl servers (the marker on the map will change from red to green).
Tip: If a device appears offline in InControl, check the following knowledge base article for a solution:
5.1. InControl 2 Group Settings
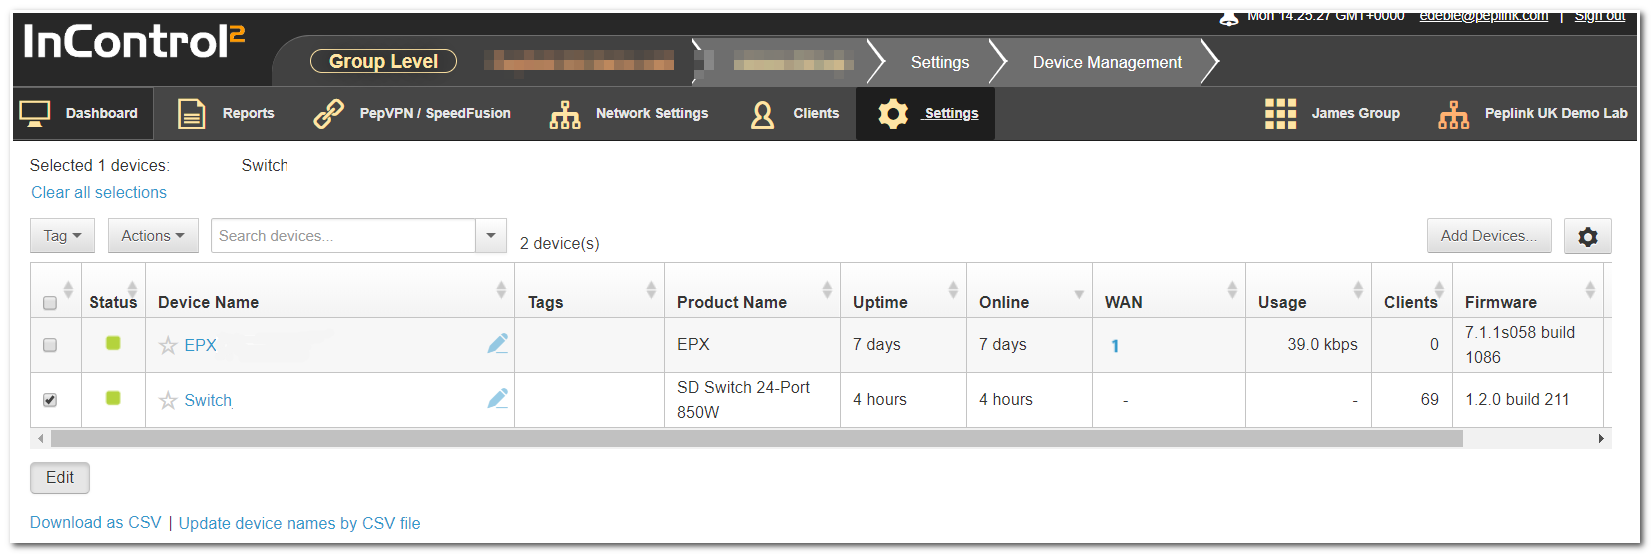
Organization > Group >Settings > Device Management
The InControl Group Settings device details show tags, product name, uptime, online time, clients, and firmware for each device.
This page also allows you to configure switch-specific options through the “Actions” drop-down list.
5.2. InControl DHCP Snooping
Organization > Group >Settings > Device Management
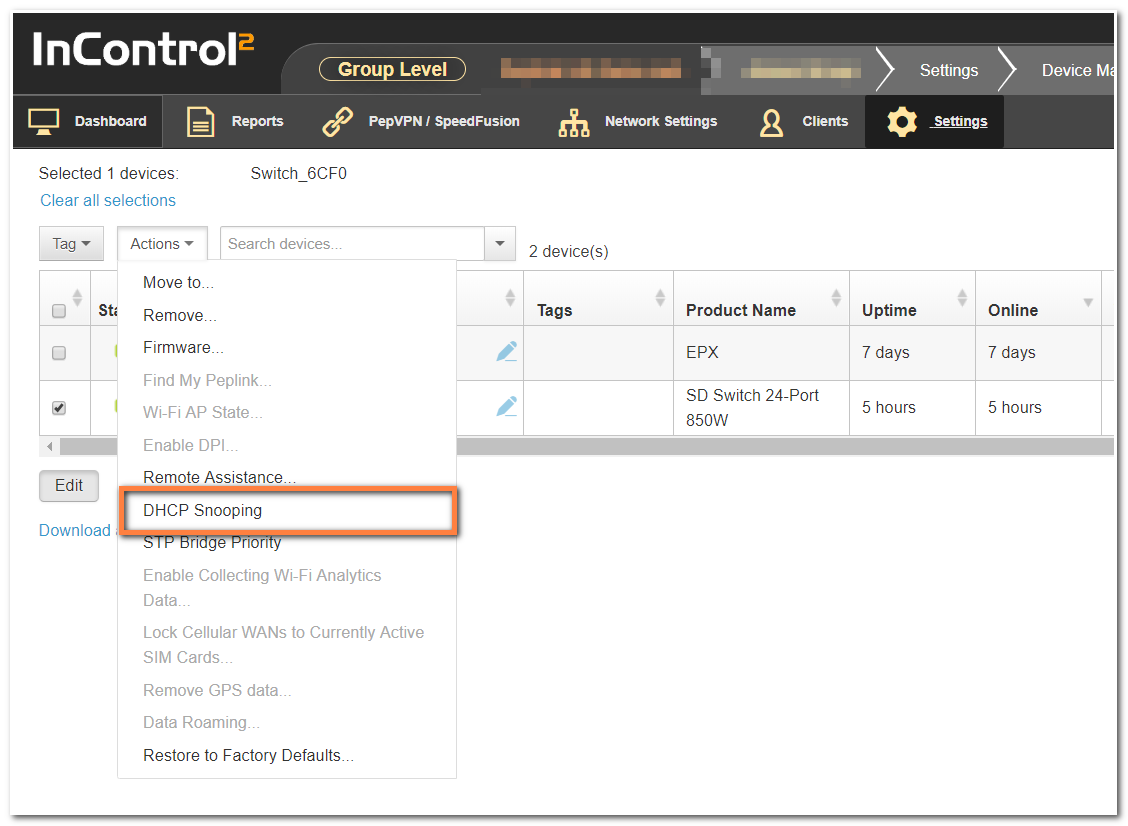
Actions > DHCP Snooping
Prevents unauthorized DHCP servers from offering IP addresses to DHCP clients.
When this is enabled, DHCP server discovery messages will only be forwarded to switch ports that are configured with the "Allow DHCP Server" option in port details.
Default setting: Disabled
5.3. InControl STP Bridge Priority
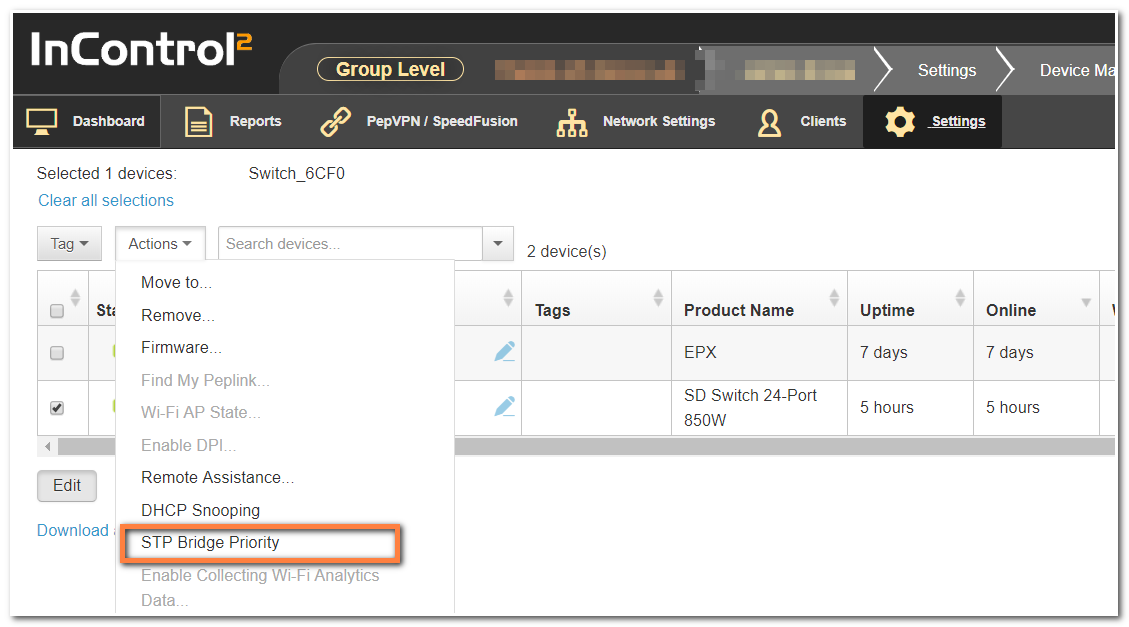
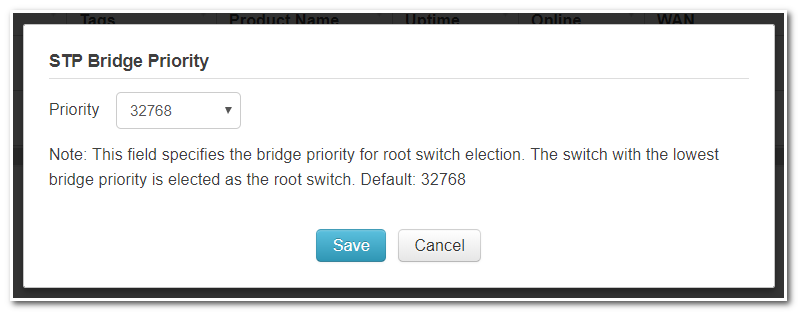
Spanning Tree Protocol (STP) uses the Spanning Tree Algorithm to avoid network loops in Layer 2 devices. STP works when multiple switches are used with redundant links, preventing Broadcast Storms, Multiple Frame Copies, and Database Instability.
The priority field specifies the bridge priority for the root switch election.
The switch with the lowest bridge priority is elected as the root switch (Default value: 32768
5.4. Configuring VLANs
Organization > Group > Network Settings > VLAN Networks
From the available InControl Group settings, the Network Settings > VLAN Networks section has several switch-specific settings and behaviors.
The switch can only be managed from InControl. VLAN One will be the default VLAN and cannot be changed or removed.
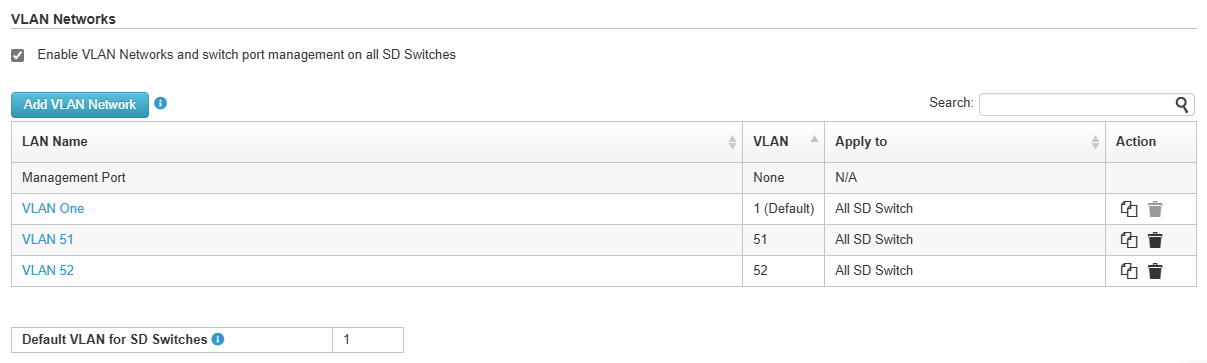
By default, this VLAN is applied to any device that is added to this group. Each VLAN can be applied to a selection of devices in the group using tags. Tags can be configured in the device details.
Detailed management of VLAN network settings:
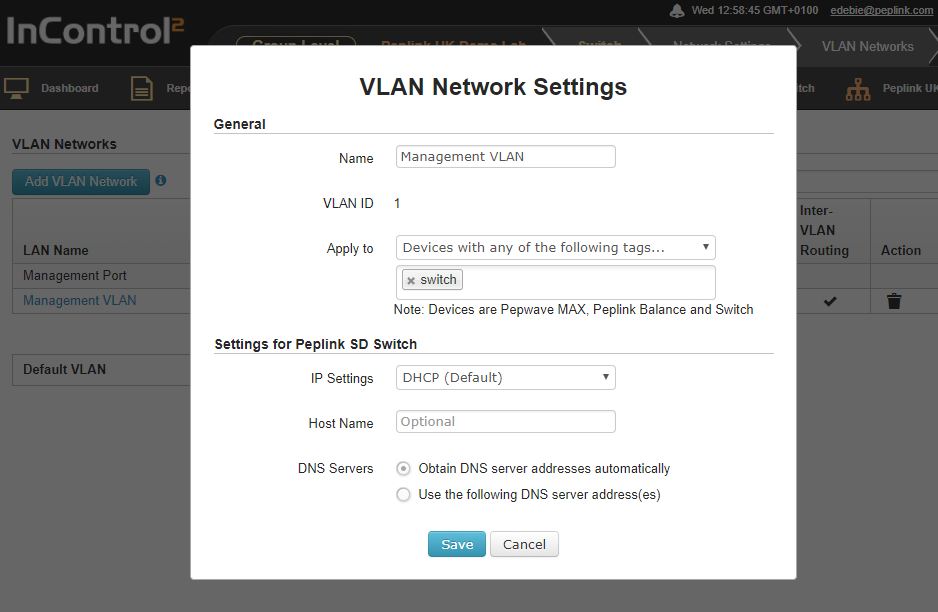
5.4.1. Define a New VLAN
To add a new VLAN, click on the “Add VLAN Network” button in the Network settings > VLAN Networks section of InControl.
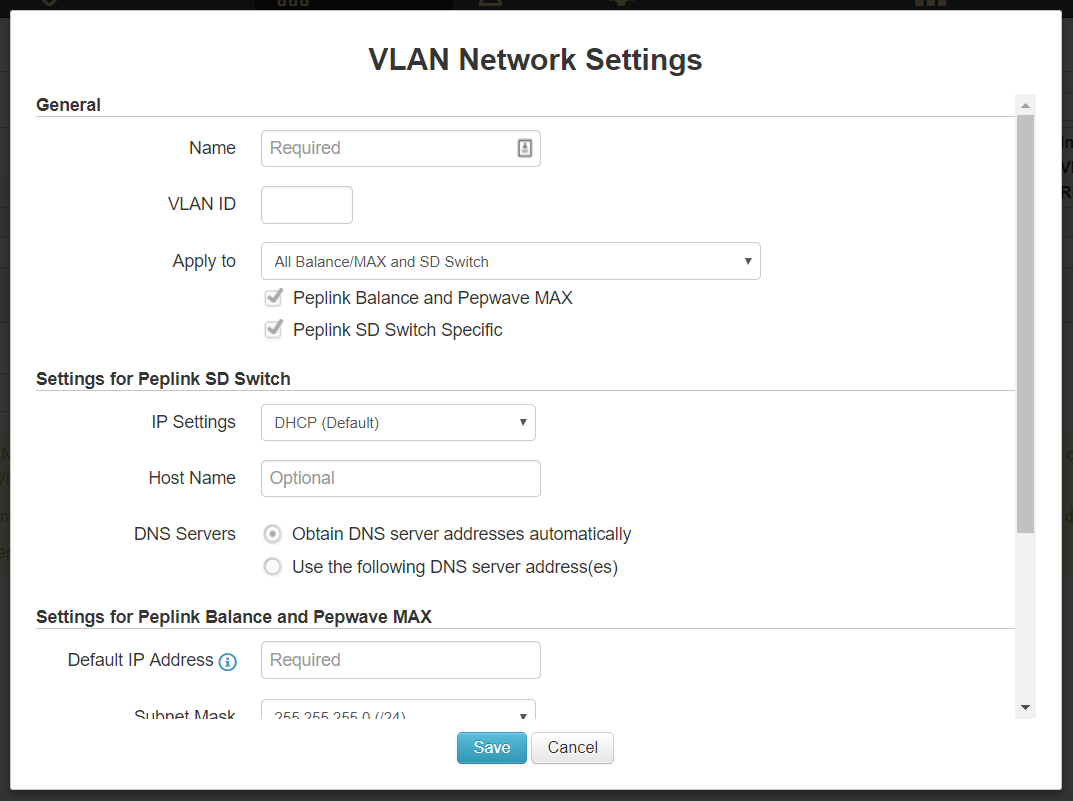
Enter the desired parameters and click “Save” to apply the settings.
5.4.2. Default VLAN Settings
The Default VLAN’s ID is 1 and cannot be changed. It only applies to the switch’s PVID-enabled trunk ports.
Untagged frames received by those ports will be classified as a VLAN identified by ID 1. All frames from the VLAN will be untagged on egress.
Note: The VLAN with ID 1 is always defined on the switches and cannot be changed or deleted.
5.5. InControl Device Details
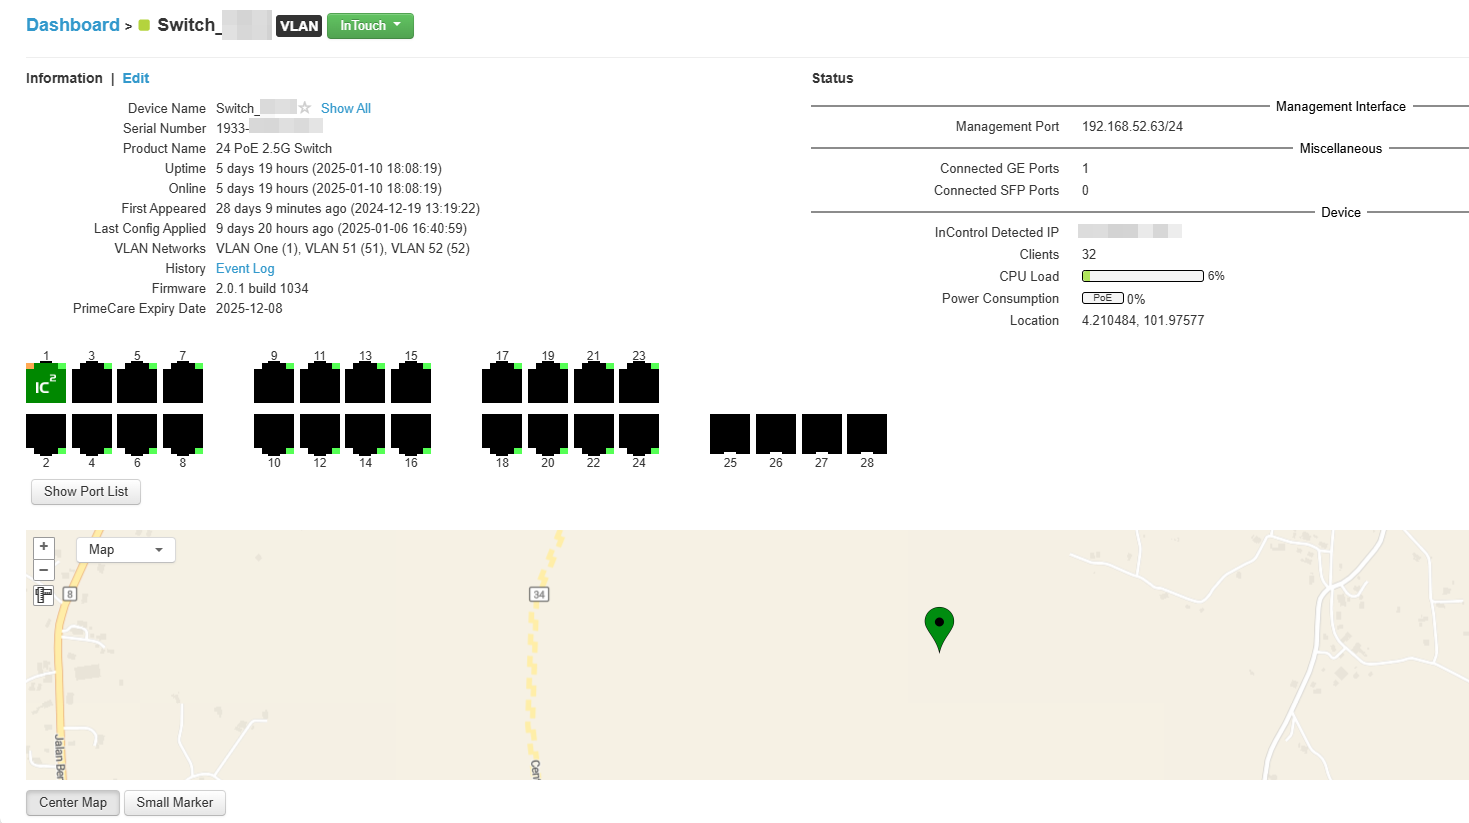
The Device Details page shows the following detailed information about the Switch:
Device Name | Firmware | Location |
Serial Number | Warranty Expiry Date | Port List |
Product Name | Management port IP | |
Tags | Connected GE ports | |
Uptime | Connected SFP/SFP+ ports | |
Online | InControl Detected IP | |
First Appeared | Clients | |
History (event log) | Power Consumption |
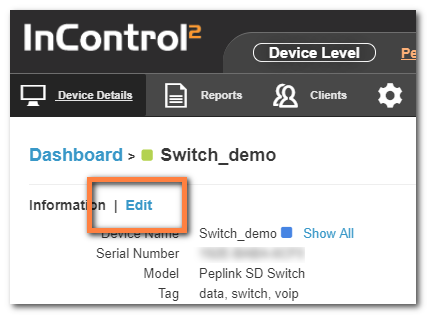
Device name, tags, location, and notes can be changed through the “Edit” link:
Select the Save button at the bottom of this page to save the settings and return to the device details page.
Or click Cancel to discard changes and return to the Device Settings page.
5.5.1. Port Details
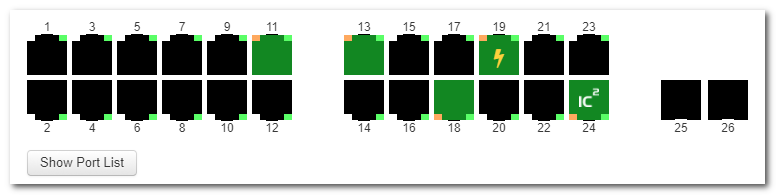
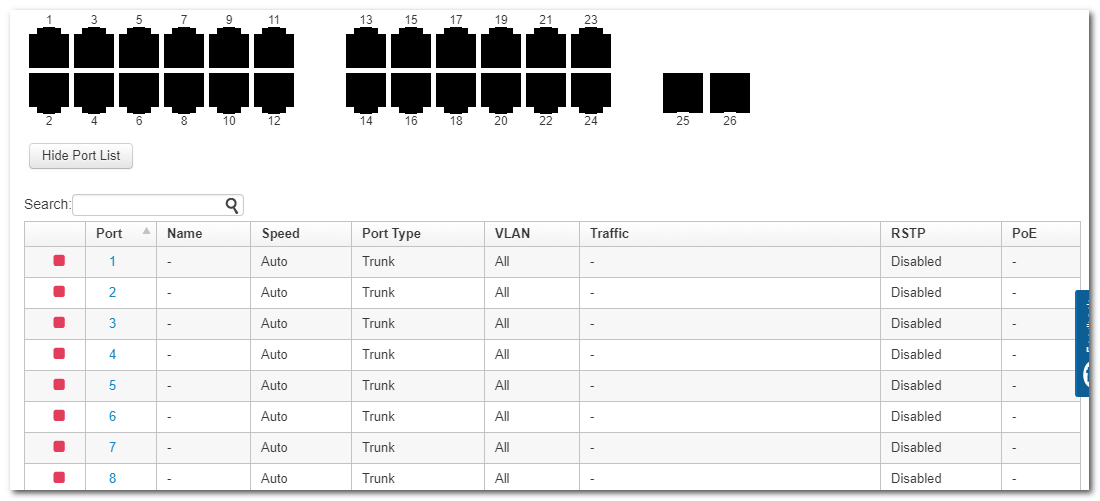
The Port List shows the available switch ports and their status. When hovering over an individual port, additional information is displayed for that particular port.
Ports 1 through 24 are RJ45 ports (Ethernet).
Ports 25 and 26 are SFP+ ports (fiber).
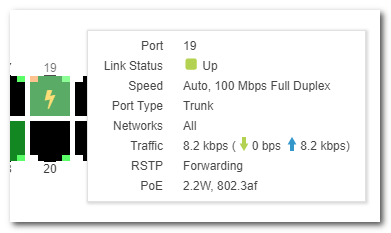
Port Icons Glossary | |
| Port down |
| Port up - PoE not drawing power |
| Port up - PoE drawing power |
| Port up - link to InControl |
| Port up - PoE disabled |


5.5.2. Port Details and Configuration
Additional port details appear when clicking on an individual port from the device details page.
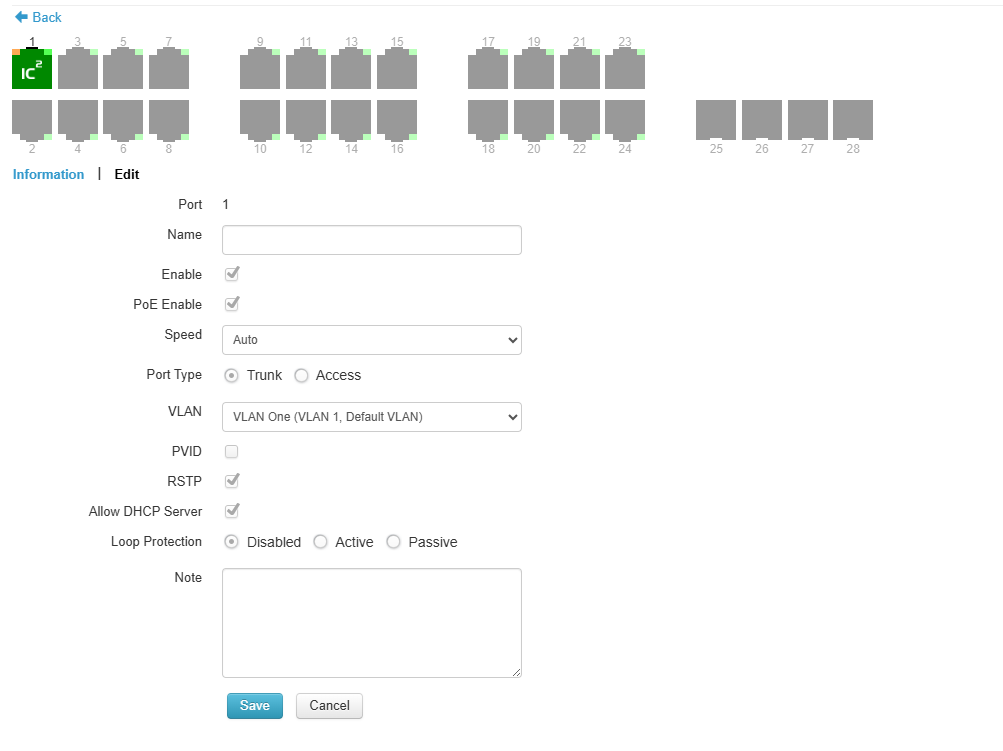
Single or multiple ports can be selected and edited.
Configurable options (port 1 - 24) | |
Enable/disable | Enable or disable the switch port |
PoE enable/disable | Enable or disable PoE on the port |
Speed^ | Select port speeds 1Gbps, 100Mbps, or 10 Mbps, half or full duplex, or 1 Gbps full Duplex. |
Port Type | Trunk or Access port |
VLAN | CUSTOM (select 1 or more existing VLANs) |
Accept Frame Type* | Frame Types the port accepts (VLAN tagged only, or All) |
RSTP | Enable or disable RSTP (Rapid Spanning Tree Protocol) |
Allow DHCP server* | Enable or disable IP assigned by DHCP |
Loop Protection | Enable/disable loop protection. |
Notes | Add additional notes |
LACP | Link Aggregation |
^ Configuration options on certain ports are configurable port speeds to 2.5 Gbps. May refer to the datasheet or label below switch ports.
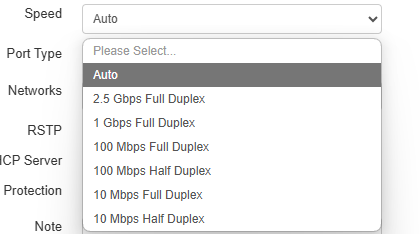
Configurable options on SFP+ ports are similar to the above, but configurable port speeds are between 100 Mbps Full Duplex and 10 Gbps Full Duplex.
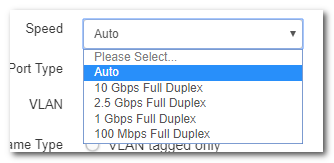
* Frame Type setting determines whether the frame should be accepted or discarded.
This option is only configurable when the Port Type is set to “Trunk” and “VLAN Networks” is set to “All”.
Available options are:
- VLAN Tagged Only: Only accept frame types from VLANs (Tagged)
- All: accept both tagged and untagged frames; when any untagged frames or frames tagged as this VLAN enter into those trunk ports, they will be assigned to this VLAN. Any frames on this VLAN leaving from those trunk ports will be untagged
* The option “Allow DHCP server” is only visible in the InControl port options when DHCP snooping on the switch is enabled on the switch.
When DHCP snooping is enabled on the switch, this option enables DHCP snooping for the individual ports, setting the option as per the default setting on the device “trusted or untrusted”.
5.5.3. Port List
The port list can be shown or hidden by clicking on the show/hide button under the ports.
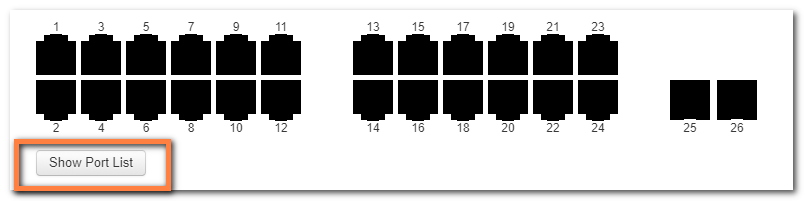
This will show (or hide) a table showing port details.
5.5.4. LACP - Link Aggregation
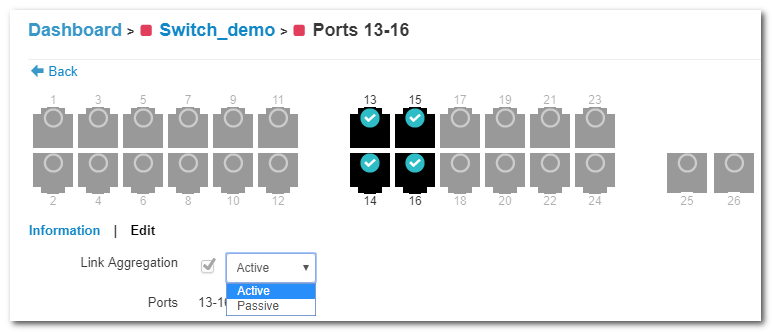
IEEE 802.3ad link aggregation enables you to group Ethernet interfaces to form a single link layer interface, also known as a link aggregation group (LAG).
The maximum number of interfaces per LAG is 24.
The advantages of link aggregation, in contrast with connections using an individual port, include:
- higher throughput speed compared to an individual port
- higher accessibility
To configure a Link Aggregation Group (LAG), click Edit after selecting multiple ports. Enable Link Aggregation by selecting the checkbox next to Link Aggregation. The LAG can be set to Active or Passive.
LACP needs to be set to Active on 1 side at least for LACP to work.
Details of Connected Clients and Hourly, Daily, or Monthly Power Usage for each Port are shown in a graph on the same page.
5.6. InControl Reports
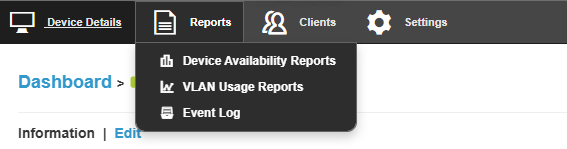
Device Availability Reports
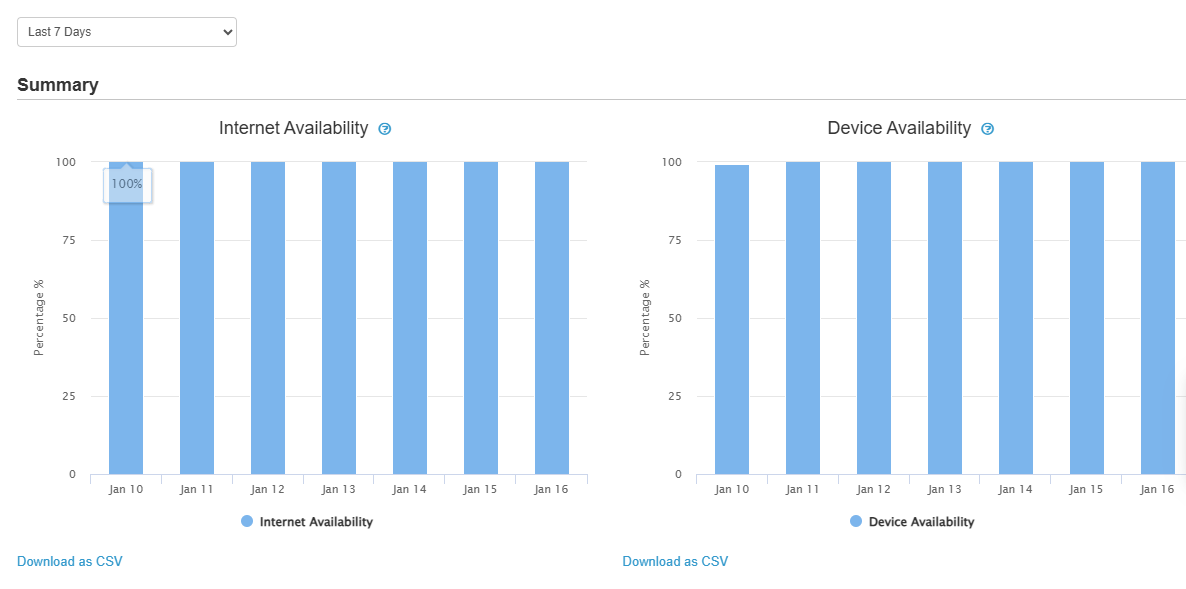
Internet Availability - "Total amount of InControl online time of the device in the day" / "Total uptime of the device in the day"
Device Availability - "Total uptime of the device in the day" / "Total amount of time of the day"
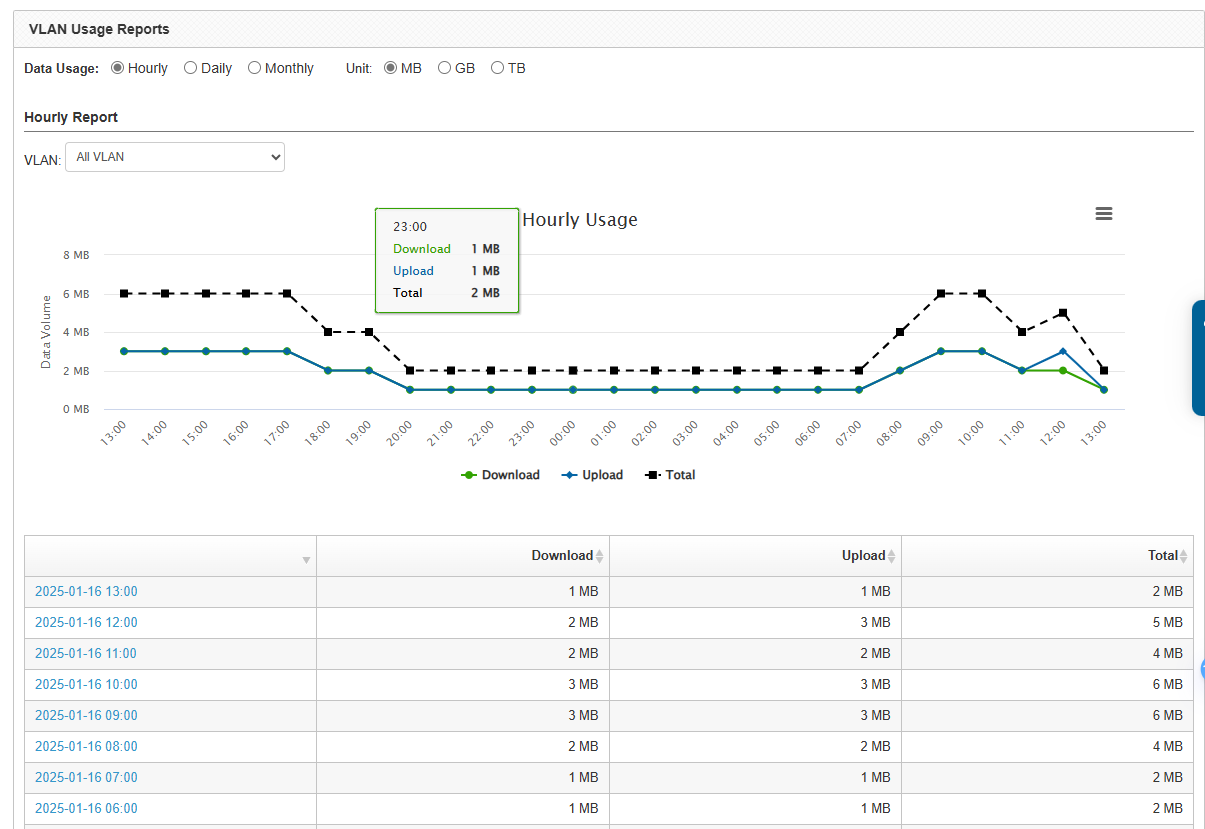
VLAN Usage Report
Event log
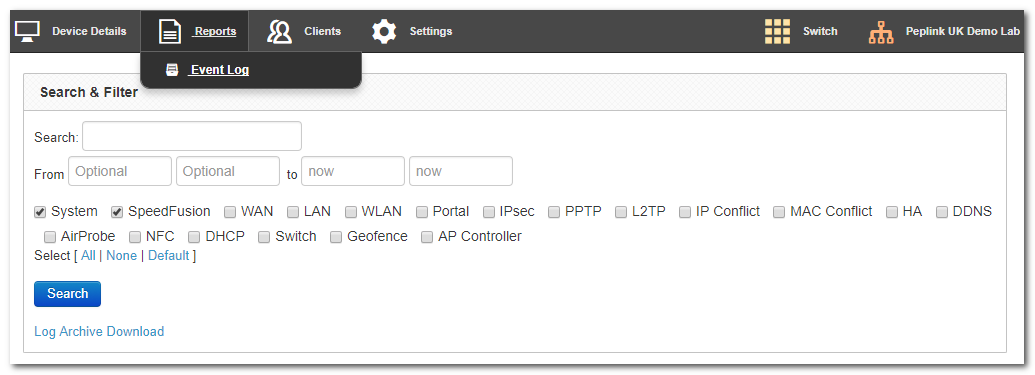
Search through the SD Switch event logs, and filter results by topic, time, client, and details.
Download the event log in .csv format.
5.7. InControl Clients
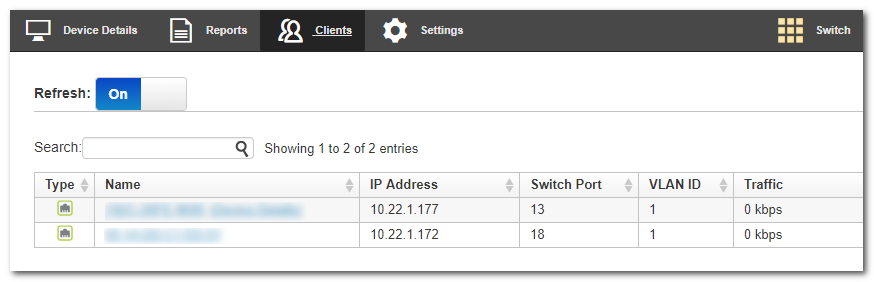
View client details from client devices connected to the SD Switch.
5.8. InControl Settings
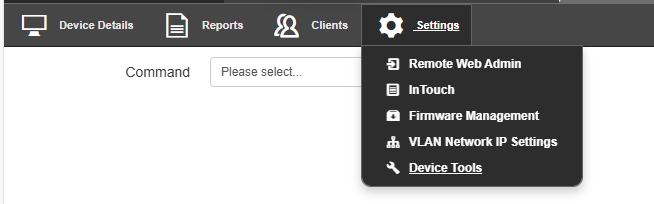
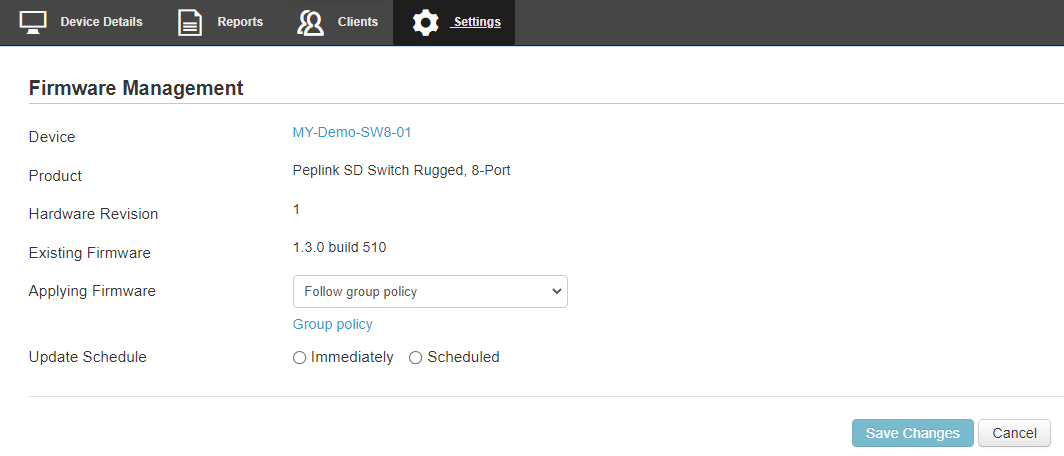
The InControl settings section gives access to the Remote Web Interface of the Switch. You can also control firmware management for all devices in this InControl group and Device Tools.
Settings > Remote Web Admin
Remote Web Admin opens the web admin interface of the SD Switch in a separate tab.
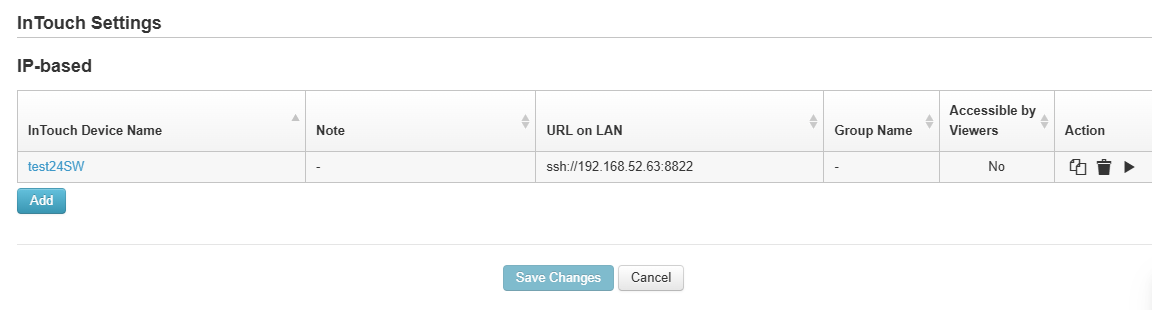
Settings > InTouch
InTouch is Peplink’s zero-touch remote network management solution, leveraging InControl 2 and a SpeedFusion Connect (formerly known as SpeedFusion Cloud) data plan. This service extends a network administrator’s ability to reach any device UI backed by a Peplink/Pepwave router. To configure InTouch, all you need is a valid InControl 2 subscription, a SpeedFusion Connect data plan, and a Peplink/Pepwave router (which requires the latest 8.2.0 firmware).
To watch a demonstration and read the FAQ, visit https://www.peplink.com/enterprise-solutions/intouch/
Settings > Firmware Management
Settings > Device Tools
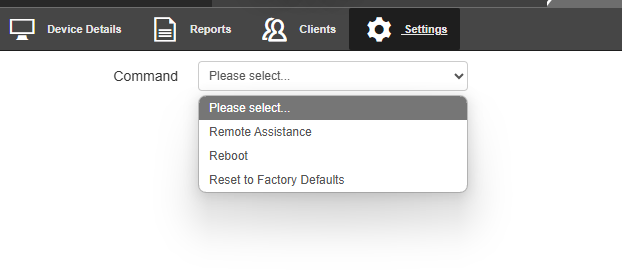
Command | |
Remote Assistance | Turn On/Off of Remote Assistance |
Reboot | Apply and reboot the device. |
Reset to Factory Defaults | Apply and reset the device to factory defaults. |