FlexModule Mini User Guide For Balance 20X / 380X / 580X#

FlexModule Mini User Guide
For Balance 20X / 380X / 580X
April 2026
Important Notes
- Please handle the connectors with care as to not damage them.
- LTE-A (CAT-6) and LTE-A Pro (CAT-12) FlexModule Minis have 2x cellular antenna connectors while LTE-A Pro (CAT-18) and 5G have 4x cellular antenna connectors. So if you are upgrading from LTE-A (CAT-6) or LTE-A Pro (CAT-12) to either LTE-A Pro (CAT-18) or 5G, you will require additional antennas.
- FlexModule Minis are fully interchangeable with other FlexModule Minis, e.g. Ethernet, and cellular.
Procedure for changing the FlexModule Mini on the B380X/B580X#
Step 1: Power off the router. The router MUST be disconnected from power before starting the upgrade.
Step 2: Disconnect all antennas.
Step 3: Loosen the screws on the cover or the installed FlexModule Mini.

Step 4: Remove the cover or module by pulling them out directly.
Step 5: Loosen the screws of the new FlexModule Mini in order to remove the module cover which is for the Balance 20X.
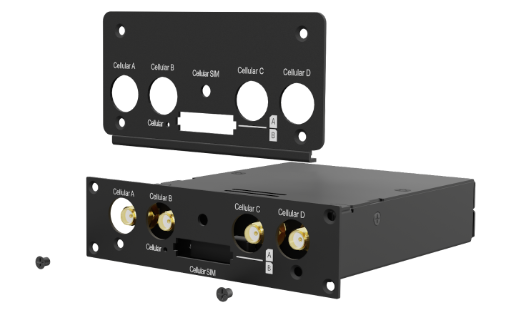
Step 6: Install the 380X/580X module cover and tighten the screws.

Step 7: Install the new module. Make sure it is correctly aligned before pressing the module firmly into place. The FlexModule Mini should sit flush with the router chassis.
Step 8: Tighten the screws until the FlexModule Mini sits flush and tight with the collar.
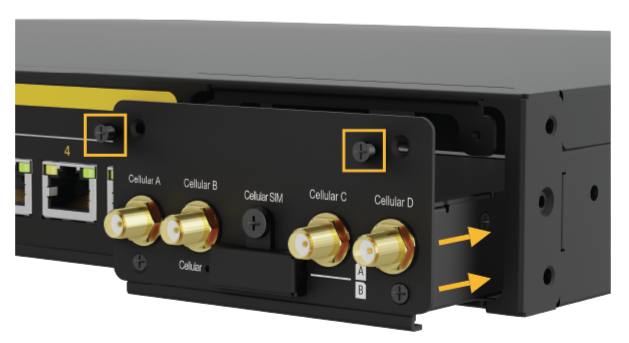
Step 9: Reconnect the antennas.
Step 10: Reconnect the power.
Procedures for changing the FlexModule Mini on the B20X#

Step 1: Power off the router. The router MUST be disconnected from power before starting the upgrade.
Step 2: Disconnect all antennas.
Step 3: Loosen the screws on the cover or the installed FlexModule Mini.

Step 4: Remove the cover or module by pulling it out directly.
Step 5: Install the new module. Make sure it is correctly aligned before pressing the module
firmly into place. The FlexModule Mini should sit flush with the router chassis.

Step 6: Tighten the screws until the FlexModule Mini sits flush and tight with the collar.
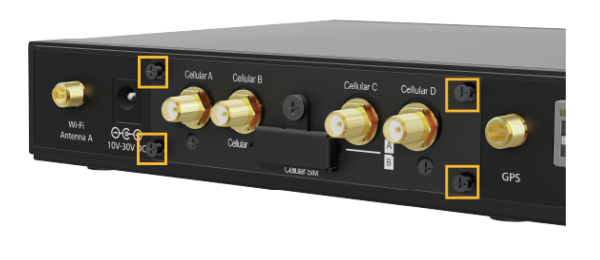
Step 7: Reconnect the antennas.
Step 8: Reconnect the power.